Basic Node
In this section, we will create a simple Unity application that does the following:
- Run a local blockchain node.
- As the node mines and appends
Blocks, show ths changes in the blockchain’s tip1.
Creating a Unity Project
First and foremost, install Unity Hub first2. Once finished,
open Unity Hub and from Installs → Install Editor, install
Unity Editor version 2021.3.0f13. After Unity Editor installation is done,
go to Projects and select New Project. From the New Project screen,
select 2D Core, select a location to save your project, and name it Clicker.
Once everything is set up, click on Create Project and wait for
Unity Editor window to show up.
Importing UniLibplanet Unity Package
Download the latest UniLibplanet.unitypackage from
the UniLibplanet repository. From Unity Editor,
select Assets → Import Package → Custom Package from the top menu
and select the downloaded [UniLibplanet.unitypackage] file. Confirm with
Import to import everything.
Basic UI
As the application will be running on top of a blockchain, our first objective
is to render the state of the blockchain itself on a screen. We will be
creating a basic UI to draw the Hash and the Index of the tip of
the blockchain in real time. For this, we create the following UI components:
- Text showing the
Hashof the blockchain’s tip. - Text showing the
Indexof the blockchain’s tip.
Running in Background
As a blockchain node, we need to make sure that the application isn’t paused
while in background. Otherwise, UI update together with mining and/or block
syncing process will hang when the application window is not in focus,
and generally this is not how we would want a blockchain node to behave.
Under the Unity Editor’s menu, navigate to Edit → Project Settings
→ Player and make sure Run In Background option is enabled.
Creating a Scene
Perform the following step by step in Unity Editor:
- Set up a scene:
- Navigate to
Assets/Scenesdirectory in Unity Editor inside the Project panel. There should beSampleScenealready inside. RenameSampleScenetoGame. - Double click on the
Gamescene to activate it. Once activated,Gameshould show inside the Hierarchy panel.
- Navigate to
- Change the background color:
- Select
Main Cameraand inside the Inspector panel, change the background color to something lighter as texts will be in black.
- Select
- Create a new canvas:
- Right click on
Gameinside the Hierarchy panel and selectGameObject→UI→Canvas. - Select
Canvasinside the Hierarchy panel. - Inside the Inspector panel, set
Render ModetoScreen Space - Camera, drag and dropMain Camerafrom the Hierarchy panel to the box next toRender Camera, and setUI Scale ModetoScale With Screen Size. - Right click on
Canvasinside the Hierarchy panel and selectProperties. SelectAdd Componentfrom the properties window and selectLayout→Horizontal Layout Group.
- Right click on
- Create an interface:
- Right click on
Canvasinside the Hierarchy panel and selectCreate Emptyto create aGameObject. Rename the newly createdGameObjectasInterface. - Inside the Scene panel, drag and resize the
Interfacerectangle to fill theCanvas. - Right click on
Interfaceinside the Hierarchy panel and selectUI→Legacy→Texttwice to create twoTextobjects. Name them asBlock HashandBlock Index. - Drag objects around inside the scene panel so they do not overlap.
- Right click on
- Create a game object:
- Right click on
Gameinside the Hierarchy panel and selectCreate Emptyto create aGameObject.
- Right click on
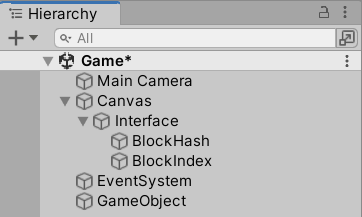
When finished, the Hierarchy panel should look something like below.

Initial UI Script
Create a file named Game.cs under Assets/Scripts with
the following content:
using UnityEngine;
using UnityEngine.UI;

namespace Scripts
{
    public class Game : MonoBehaviour
    {
        public Text BlockHashText;
        public Text BlockIndexText;

        public void Awake()
        {
            BlockHashText.text = "Block Hash: 0000";
            BlockIndexText.text = "Block Index: 0";
        }
    }
}
Connecting UI to the Script
Finally, we connect the script above to the UI using the following steps:
- Select
GameObjectfrom the Hierarchy panel. - Inside the Inspector panel, select
Add Component→Scripts→Scripts→Game. - Inside the Inspector panel, under
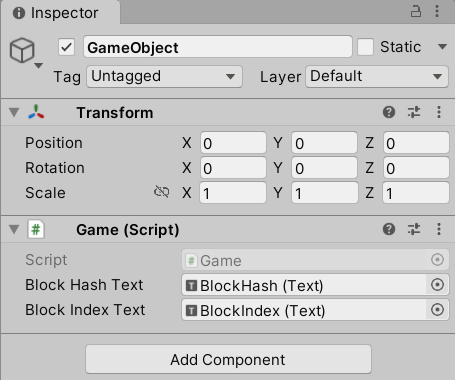
Gamecomponent, you should seeBlock Hash Text,Block Index Text; drag and drop text objects from the Hierarchy panel to each corresponding box accordingly.
When done, the Inspector panel for GameObject should look like below.

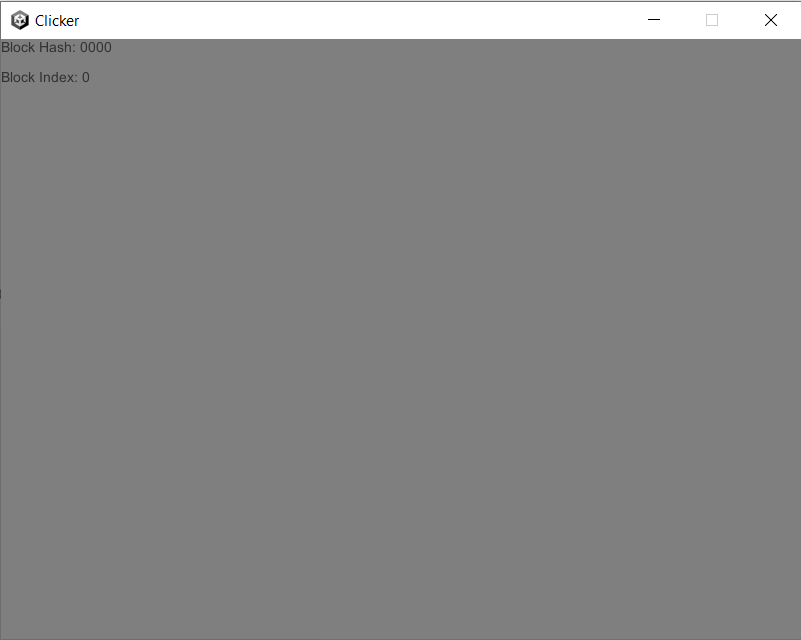
Try Build and Run from Unity Editor. If everything was done accordingly,
you should see Block Hash: 0000 and Block Index: 0 on your screen.

Rendering Blocks
Now, let’s try to run a blockchain node. Update the content of Game.cs
we already have created previously with the following:
using System.Collections.Generic;
using Libplanet.Action;
using Libplanet.Blocks;
using Libplanet.Blockchain.Renderers;
using Libplanet.Unity;
using UnityEngine;
using UnityEngine.UI;
using UnityEngine.Events;

namespace Scripts
{
    // Unity event handler.
    public class BlockUpdatedEvent : UnityEvent<Block<PolymorphicAction<ActionBase>>>
    {
    }

    public class Game : MonoBehaviour
    {
        // Connected to UI elements.
        public Text BlockHashText;
        public Text BlockIndexText;

        private BlockUpdatedEvent _blockUpdatedEvent;
        private IEnumerable<IRenderer<PolymorphicAction<ActionBase>>> _renderers;
        private Agent _agent;

        // Unity MonoBehaviour Awake().
        public void Awake()
        {
            // General application settings.
            Screen.SetResolution(800, 600, FullScreenMode.Windowed);
            Application.SetStackTraceLogType(LogType.Log, StackTraceLogType.ScriptOnly);

            // Register a listener.
            _blockUpdatedEvent = new BlockUpdatedEvent();
            _blockUpdatedEvent.AddListener(UpdateBlockTexts);

            // Renderers are called when certain conditions are met.
            // There are different types of renderers called under different conditions.
            // Some are called when a new block is added, some are called when an action is executed.
            _renderers = new List<IRenderer<PolymorphicAction<ActionBase>>>()
            {
                new AnonymousRenderer<PolymorphicAction<ActionBase>>()
                {
                    BlockRenderer = (oldTip, newTip) =>
                    {
                        // FIXME: For a genesis block, this renderer can get called
                        // while Libplanet's internal BlockChain object is not
                        // fully initialized.  This is a haphazard way to bypass
                        // NullReferenceException getting thrown.
                        if (newTip.Index > 0)
                        {
                            _agent.RunOnMainThread(() => _blockUpdatedEvent.Invoke(newTip));
                        }
                    }
                }
            };

            // Initialize a Libplanet Unity Agent.
            _agent = Agent.AddComponentTo(gameObject, _renderers);
        }

        // Unity MonoBehaviour Start().
        public void Start()
        {
            // Initialize texts.
            BlockHashText.text = "Block Hash: 0000";
            BlockIndexText.text = "Block Index: 0";
        }

        // Updates block texts.
        private void UpdateBlockTexts(Block<PolymorphicAction<ActionBase>> tip)
        {
            BlockHashText.text = $"Block Hash: {tip.Hash.ToString().Substring(0, 4)}";
            BlockIndexText.text = $"Block Index: {tip.Index}";
        }
    }
}
In order for an application to react to a blockchain level event, such as
a change in the tip of the local blockchain and/or created actions
getting executed, the application needs to pass a set of callback methods
for an Agent to call. These are called renderers and must implement
the IRenderer interface.
In the example above, when the tip of the blockchain changes, the blockchain calls the method
BlockRenderer = (oldTip, newTip) =>
{
    if (newTip.Index > 0)
    {
        _agent.RunOnMainThread(() => _blockUpdatedEvent.Invoke(newTip));
    }
}
where it is picked up by UpdateBlockTexts() method as it was added as
a listener to _blockUpdatedEvent in the previous part of the code.
For now, just note Agent is simply a wrapper class for handling a Libplanet
blockchain node. Also don’t worry about PolymorphicAction<ActionBase>
for now. This will be explained further later.
Running a Blockchain Node
In order to run a Libplanet blockchain node, the following three are needed:
- A genesis block: This is the very first block of a blockchain. Only nodes with the same genesis block can properly communicate with each other.
- A swarm configuration: A
jsonfile that determines the behavior of a node, This is outside the scope of this tutorial. - A private key: This determines the identity of a node. All transactions created and all blocks mined will be signed using this private key.
These three files can be easily created using Unity Editor menu. Create each
using Create genesis block, Create swarm config, and Create private key
under Tools → Libplanet.
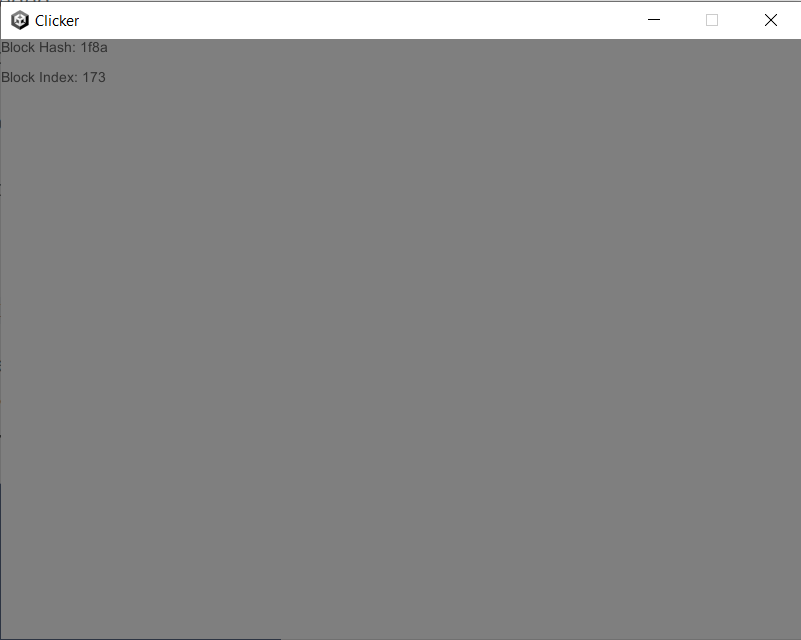
Now, you can build and run the application. If you see the Block Hash text
and the Block Index text on your screen updating periodically, then you
are now running a blockchain node!

At first, block index might be going up rather fast, but after a while, the blockchain will adjust accordingly and slow down.