Multiple Nodes
Disclaimer: This section is still work in progress. This section does not work with the current release version 0.5.0 of UniLibplanet.
The application building part for Clicker is mostly done by this point.
Provided with a right configuration, Clicker already can act as a
blockchain node when run. We just need to test if two different nodes
can communicate with each other and that a node can sync up to a different node
on the shared network if necessary.
For this part of the tutorial, we will be assuming you have access to at least two computers sharing a local area network.
Seed Node
As a “normal” user try to start running his/her own node, it needs to know where to connect initially in order to join an existing blockchain network. A seed node of a network is a node that can act as an entry point for such other node that is trying to join the network. In general, this information needs to be known before the application is distributed.
For this, we will setup a blockchain network in such a way that the client
binary on the computer that you have been using to develop the Clicker
application will be running as a seed node.
Generate BoundPeer String
Libplanet uses what is called BoundPeer to manage peer to peer connections.
Each BoundPeer has its special string format, that is of the form
<public_key>,<dns_end_point>,<port>, which can be directly handled
by Libplanet. We need to somehow generate this string first.
First, under Unity Editor’s menu, select Tools → Libplanet → Private key
→ Open private key file location to open up a folder containing a private key.
There should be a file named private_key. This is just a text file without
an extension, so open it with any text editor to see what is inside.
Copy the hexadecimal string found inside the file to the clipboard.
Now go back to Unity Editor, and under its menu, select Tools → Libplanet →
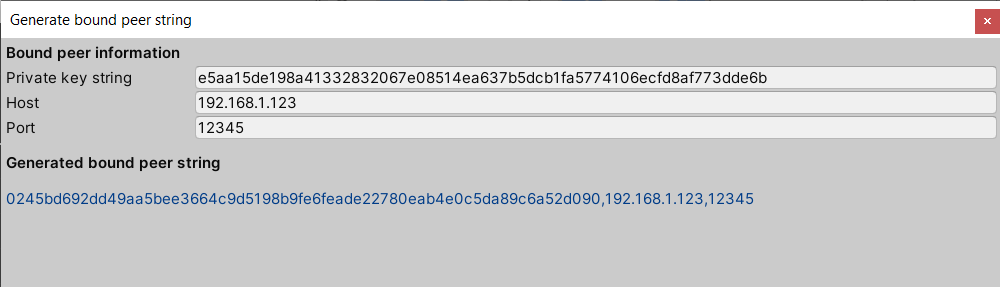
Utils → Generate bound peer string to open up a window for generating a
BoundPeer string. Paste the private key you have copied into a field next
to Private key string.
Let’s suppose your development machine has a local IP address of 192.168.1.123
and you want to use 12345 as the communicating port. Enter 192.168.1.123
into a field next to Host and 12345 next to Port.
If all fields are valid, you should see a generated BoundPeer string appear.
Drag and copy it to the clipboard.
Edit Distributed swarm_config.json
Now open up the swarm_config.json file inside the StreamingAssets directory
and edit the SeedPeers property to include the BoundPeer string from above:
"SeedPeers": [
    "0245bd692dd49aa5bee3664c9d5198b9fe6feade22780eab4e0c5da89c6a52d090,192.168.1.123,12345"
],
Build the application again. There should be a copy of swarm_config.json
file inside your build directory under Clicker_Data/StreamingAssets.
Make sure SeedPeers is not empty1.
Additional Preparation
If you have an additional computer ready, now is the time to copy the build
directory to a computer that will act as a non-seed node. You may place
the copied directory anywhere you like. For convenience, we will refer to
the seed node computer as Node A and the non-seed node computer as Node B.
Edit Node A’s swarm_config.json so that its Host and Port matches
that of the BoundPeer string.
"Host": "192.168.1.123",
"Port": 12345,
Edit Node B’s swarm_config.json to match its local IP address,
say 192.168.1.234, and use the same port as that of Node A’s2.
"Host": "192.168.1.234",
"Port": 12345,
As mentioned in Basic Node section, we need three files for Node B to run,
namely genesis_block, swarm_config.json, and private_key. As both
genesis_block and swarm_config.json are distributed as a part of
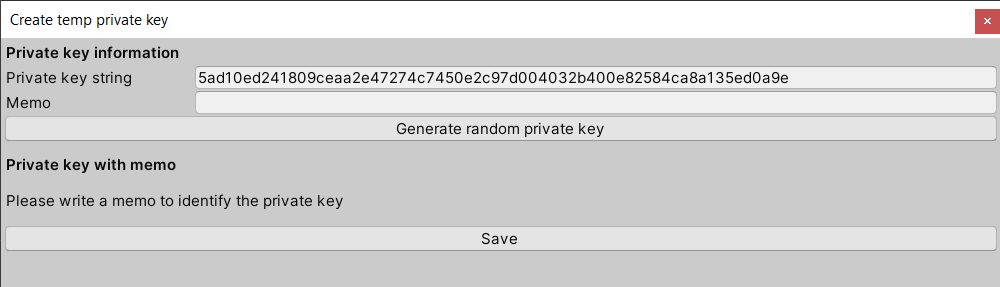
the build, we need to create a private_key file for Node B. Using
Unity Editor, under Tools -> Libplanet -> Private keys -> Create temp
private key. Select Generate random private key to generate a random
private key.
Create a new file named private_key anywhere on your computer and copy-paste
the private key string into the file and save. Move the private_key file
just created to Node B under %APPDATA%/../LocalLow/DefaultCompany/Clicker.
In a production environment, you might want to make it so that the game client and/or its launcher provide a way to automate this process.
Running Multiple Nodes
Now we just need to run both binaries on Node A and Node B. It is
important to note that a seed node must be running first. Run Node A’s
Clicker.exe first, then wait a while, and run Node B’s Clicker.exe.
Now you can click the buttons on both computers and see the ScoreBoard
reflect the counts from both nodes!
Footnotes
-
As with any computer program, it is not unreasonable to expect there to be some unexpected down time for any node. Therefore, it is recommended to have multiple seed nodes ready for a production environment. ↩
-
Technically, for any non-seed node, any usable port is fine, as the node will be announcing its listening port. This is not the case for seed nodes, as other non-seed nodes need to have a fixed point of entry to the blockchain network. ↩